
Google Cloud Run has been finding its way into more of my projects (despite its name having rather poor SEO). I see it basically as the equivalent of AWS Lambda or Cloud Functions, but you can use any arbitrary Docker image. Whereas Lambda and Cloud Functions have a limited selection of supported languages and runtimes, Cloud Run can run anything that can be Docker-ized. For example, I’ve used Cloud Run to deploy “serverless” Rust services.
Cloud Run also has a similar “pay for what you use” pricing model as Lambda and Cloud Functions (and there’s also a quite generous free tier), so it’s a great choice for small “set it and forget it” projects.
One thing that Cloud Run doesn’t have out of the box is the ability to schedule invocations. For that, we have to turn to Cloud Scheduler. I couldn’t find any great tutorials on how to set this up, especially if you don’t want your Cloud Run endpoint to be publicly accessible. So here it goes: how to setup a a secured Cloud Run service to run on a schedule.
Overview
Here’s what we’ll be doing:
- Setting up a Cloud Run service that requires authentication to invoke.
- Creating an IAM Service Account to invoke the Cloud Run service.
- Setting up a Cloud Scheduler job that uses the Service Account to invoke your service.
I’ll be showing how to do this via the GCP web interface, as well as via the gcloud CLI tool.
Step 1: Create a Cloud Run service
-
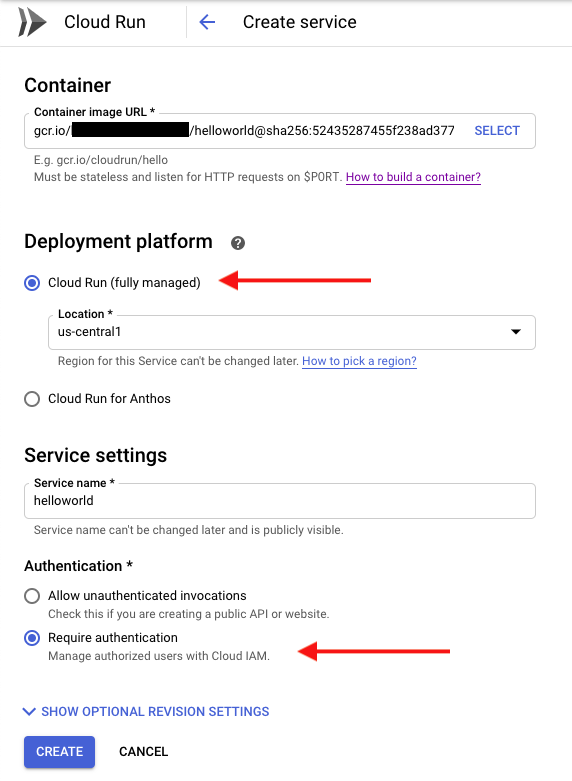
Go to the Cloud Run Console and click “Create Service”.
- Note: You’ll already need to have pushed an image to the GCP Container Registry for your service.
-
Fill in the service as in the screenshot below. - Make sure to select “fully manageds” in the deployment platform and set the authentication option to “Require authentication”.
-
Take note of the URL for your service. It’ll look something like:
https://SERVICE_NAME-abc123-uc.a.run.app/
Alternatively: You can perform the same steps as above using the
gcloud CLI:
gcloud alpha run deploy SERVICE_NAME \
    --image gcr.io/PROJECT_ID/CONTAINER_NAME \
    --platform managed \
    --no-allow-unauthenticated
Step 2: Create a service account
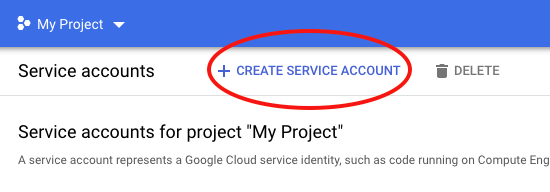
- Visit the
Service Accounts section of the Cloud IAM console
and click “Create a Service Account”.
- Fill in the account name and account ID.
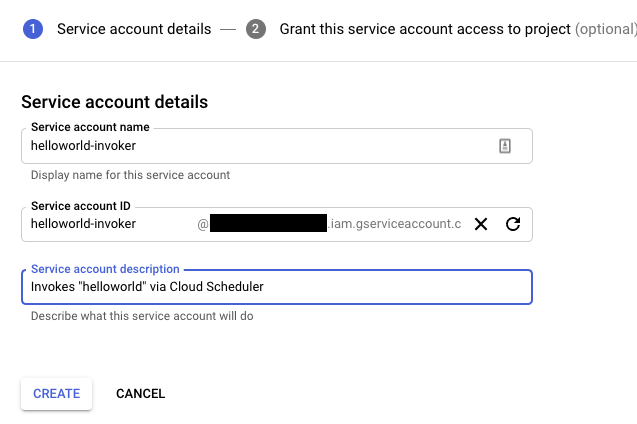
- Add the “Cloud Run Invoker” role to the service account.

Alternatively: You can perform the same steps as above using the
gcloud CLI:
gcloud iam service-accounts create SERVICE_ACCOUNT_ID

gcloud iam service-accounts add-iam-policy-binding \
    SERVICE_ACCOUNT_ID
    --member "serviceAccount:SERVICE_ACCOUNT_ID@PROJECT_ID.iam.gserviceaccount.com" \
    --role "roles/run.invoker"
Step 3: Create a Cloud Scheduler job
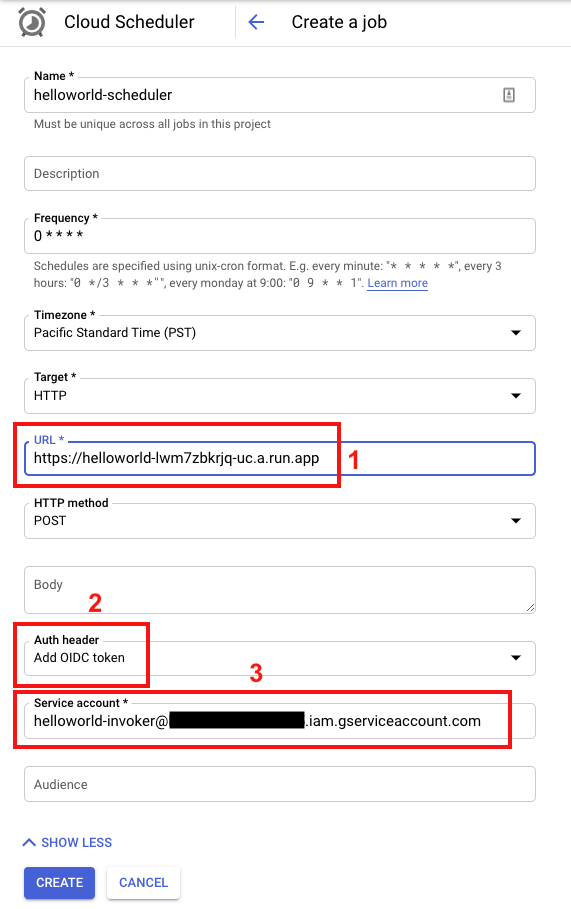
- Go to the Cloud Scheduler console and click “Create Job”.
- Fill in the job values as the screenshot below.
- Set the URL (1) to be the URL of your Cloud Run service.
- Set the Auth Header (2) to be “Add OIDC Token”, so that the job will forward IAM credentials when calling the endpoint.
- Set the Service Account (3) to the email address of the Service
Account you created in Step 2.
Alternatively: You can perform the same steps as above using the
gcloud CLI:
gcloud scheduler jobs create http \
    JOB_NAME \
    --schedule SCHEDULE \
    --uri CLOUD_RUN_URL \
    --oidc-service-account-email SERVICE_ACCOUNT_EMAIL
Step 4: Testing
Now that it’s all setup, you can go back to the Cloud Scheduler Console and hit “Run Now” to test your job.

Assuming the authentication has been setup correctly, you should see that the test job run succeeded.
Conclusion
Now you have a Cloud Run Service that’s set to run on a specified schedule in a secure way so that only you can trigger invocations.
This essentially allows you to run any Docker container on a schedule (provided that it can be triggered by an HTTP request).
I’ve found this to be quite useful for cron-type jobs that I want to run in the cloud. Good examples include: Twitter bots, periodic data scraping, and (smallish) batch data processing jobs.
Additional Resources
- Cloud Run CLI Reference
- Service Account CLI Reference:
- Cloud Scheduler CLI Reference