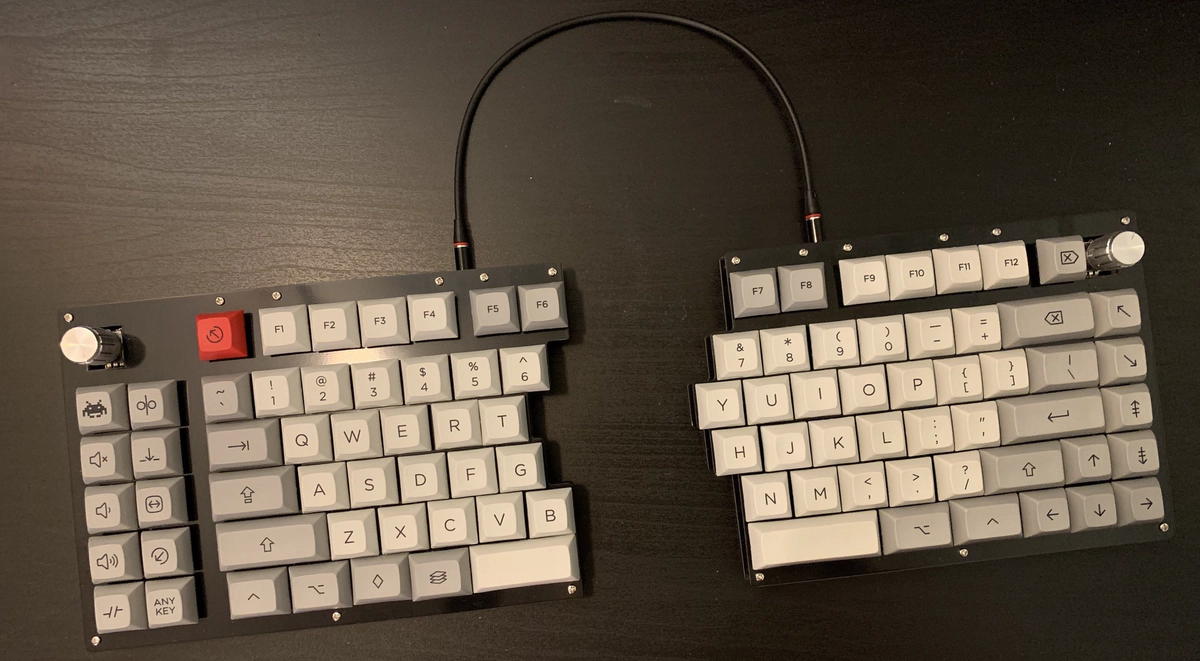
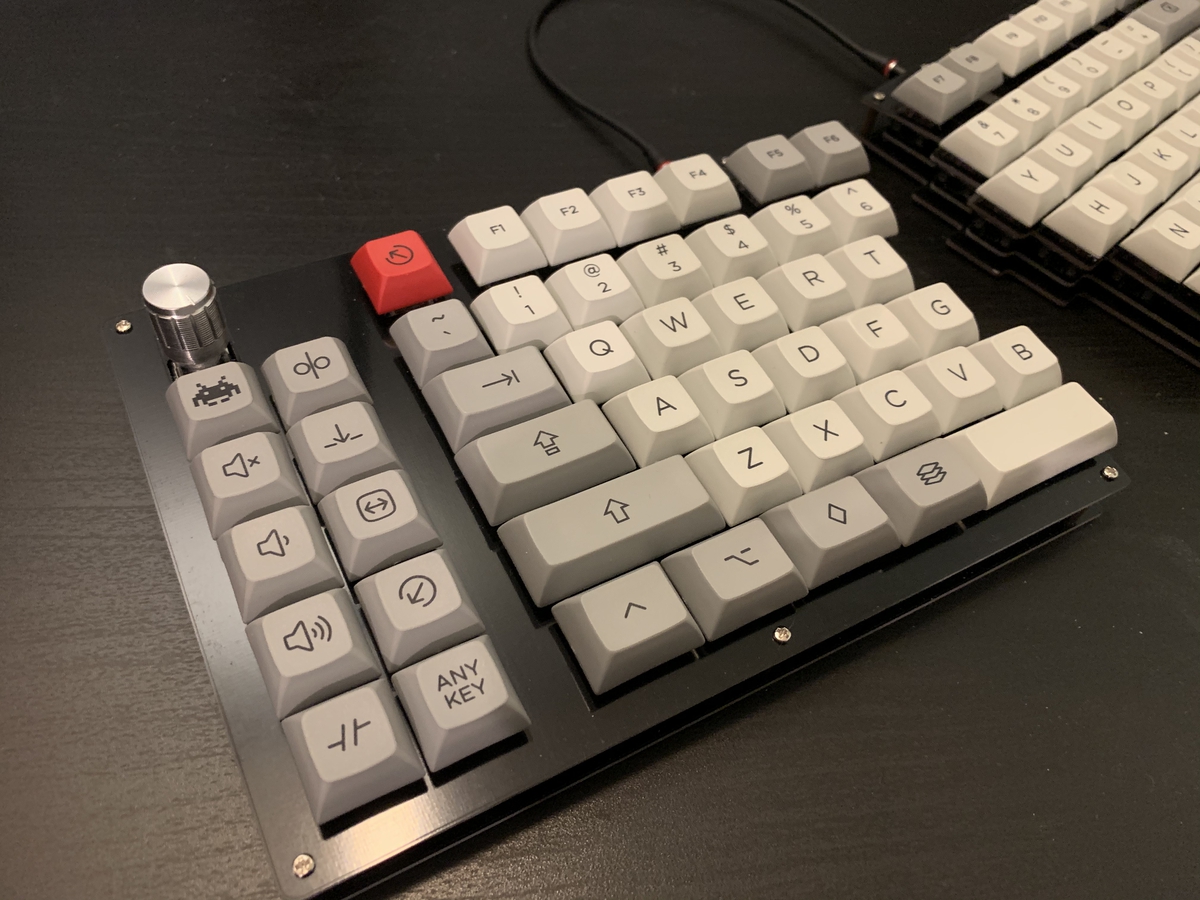
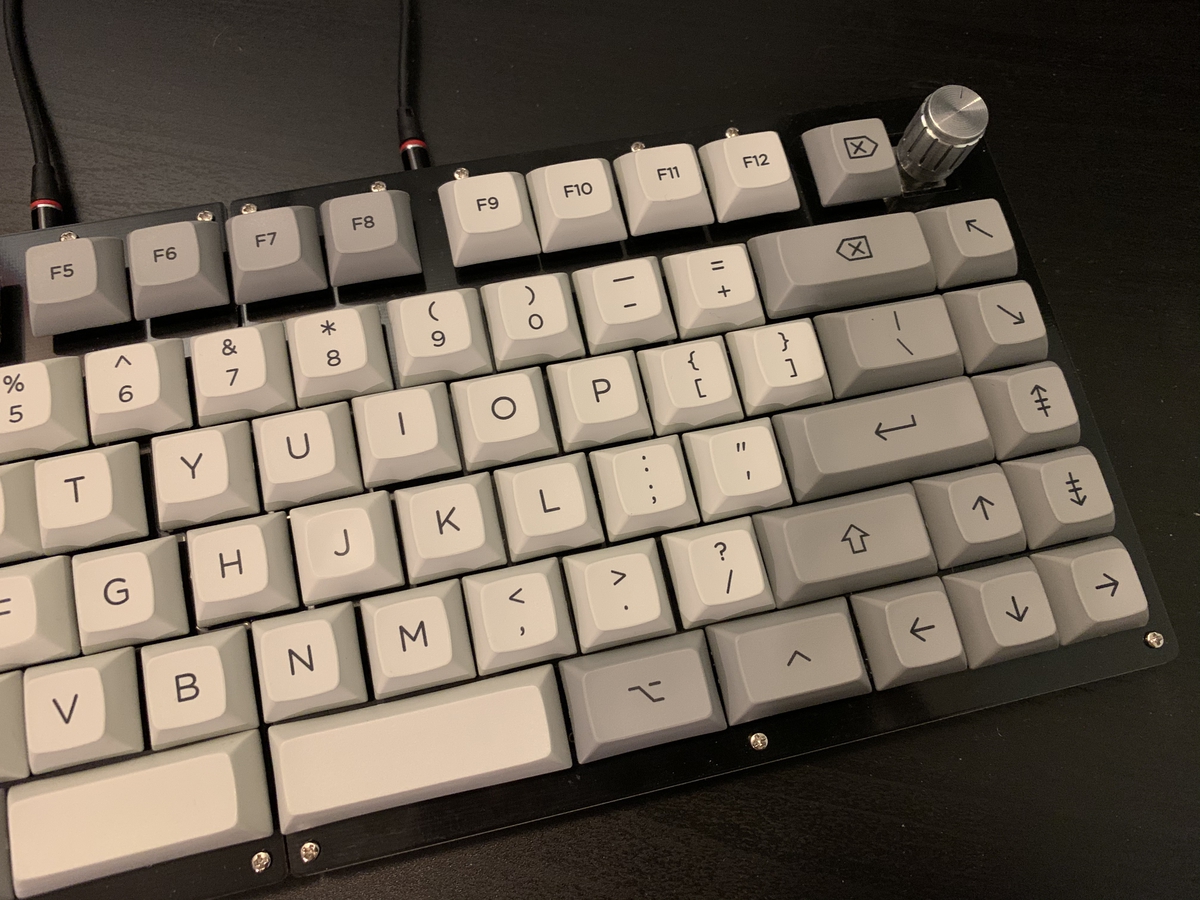
tl;dr: I built a split mechanical keyboard. It looks like this:
Intro
At the beginning of the COVID-19 lockdown, I noticed that I was feeling wrist strain while working at home. I’ve been using a vertical mouse for several years, but up until recently I was using a conventional keyboard.1 I’d seen anecdotes that split keyboard designs can be more ergonomic, and I’d experienced that myself when I used Microsoft’s Sculpt Keyboard during an internship. I eventually bought a Kinesis Freestyle Pro, and in the process of researching that keyboard I became more interested in split mechanical keyboards.
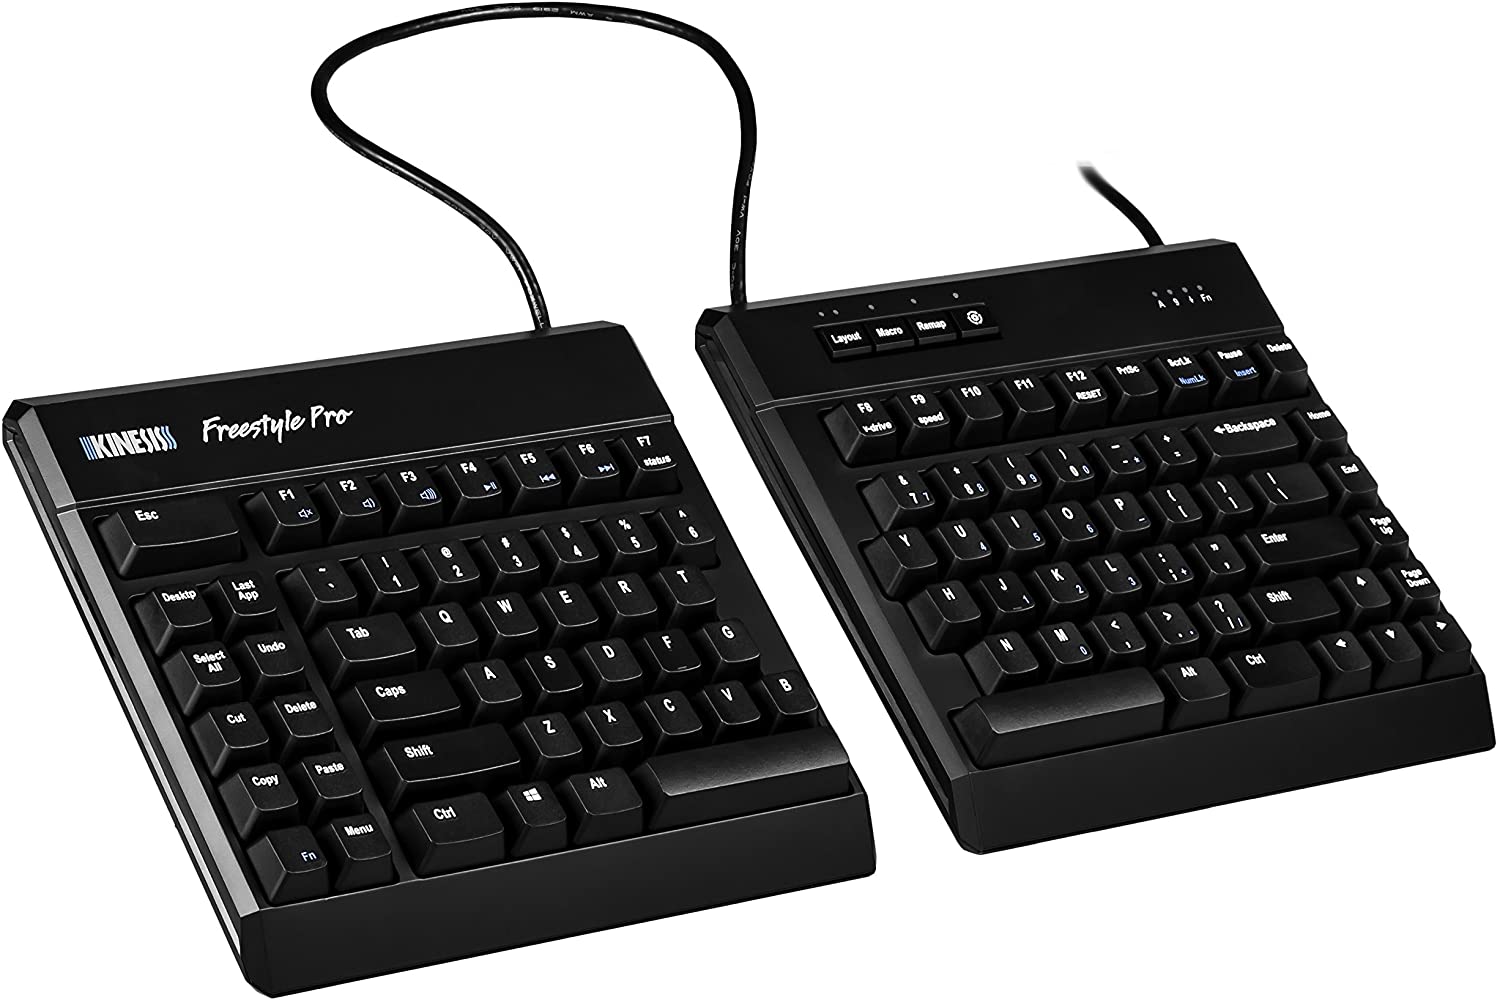
Kinesis Freestyle Pro
I’ve been using my Kinesis keyboard for the past few months, and have found the split layout to be very comfortable. It allows me to have my wrists and arms in a more neutral position, which reduces strain during long sessions of use. Importantly, the split layout doesn’t affect my typing speed – it’s essentially just a normal QWERTY keyboard split along the middle. Other split layouts (like the Ergodox) require a longer re-learning period.
Though I really like my Kinesis keyboard, it’s not a particularly aesthetically pleasing object. During my research, I stumbled upon a community sourced list of split keyboards by a user of /r/mechanicalkeyboards. This inspired me to want to build my own split keyboard.
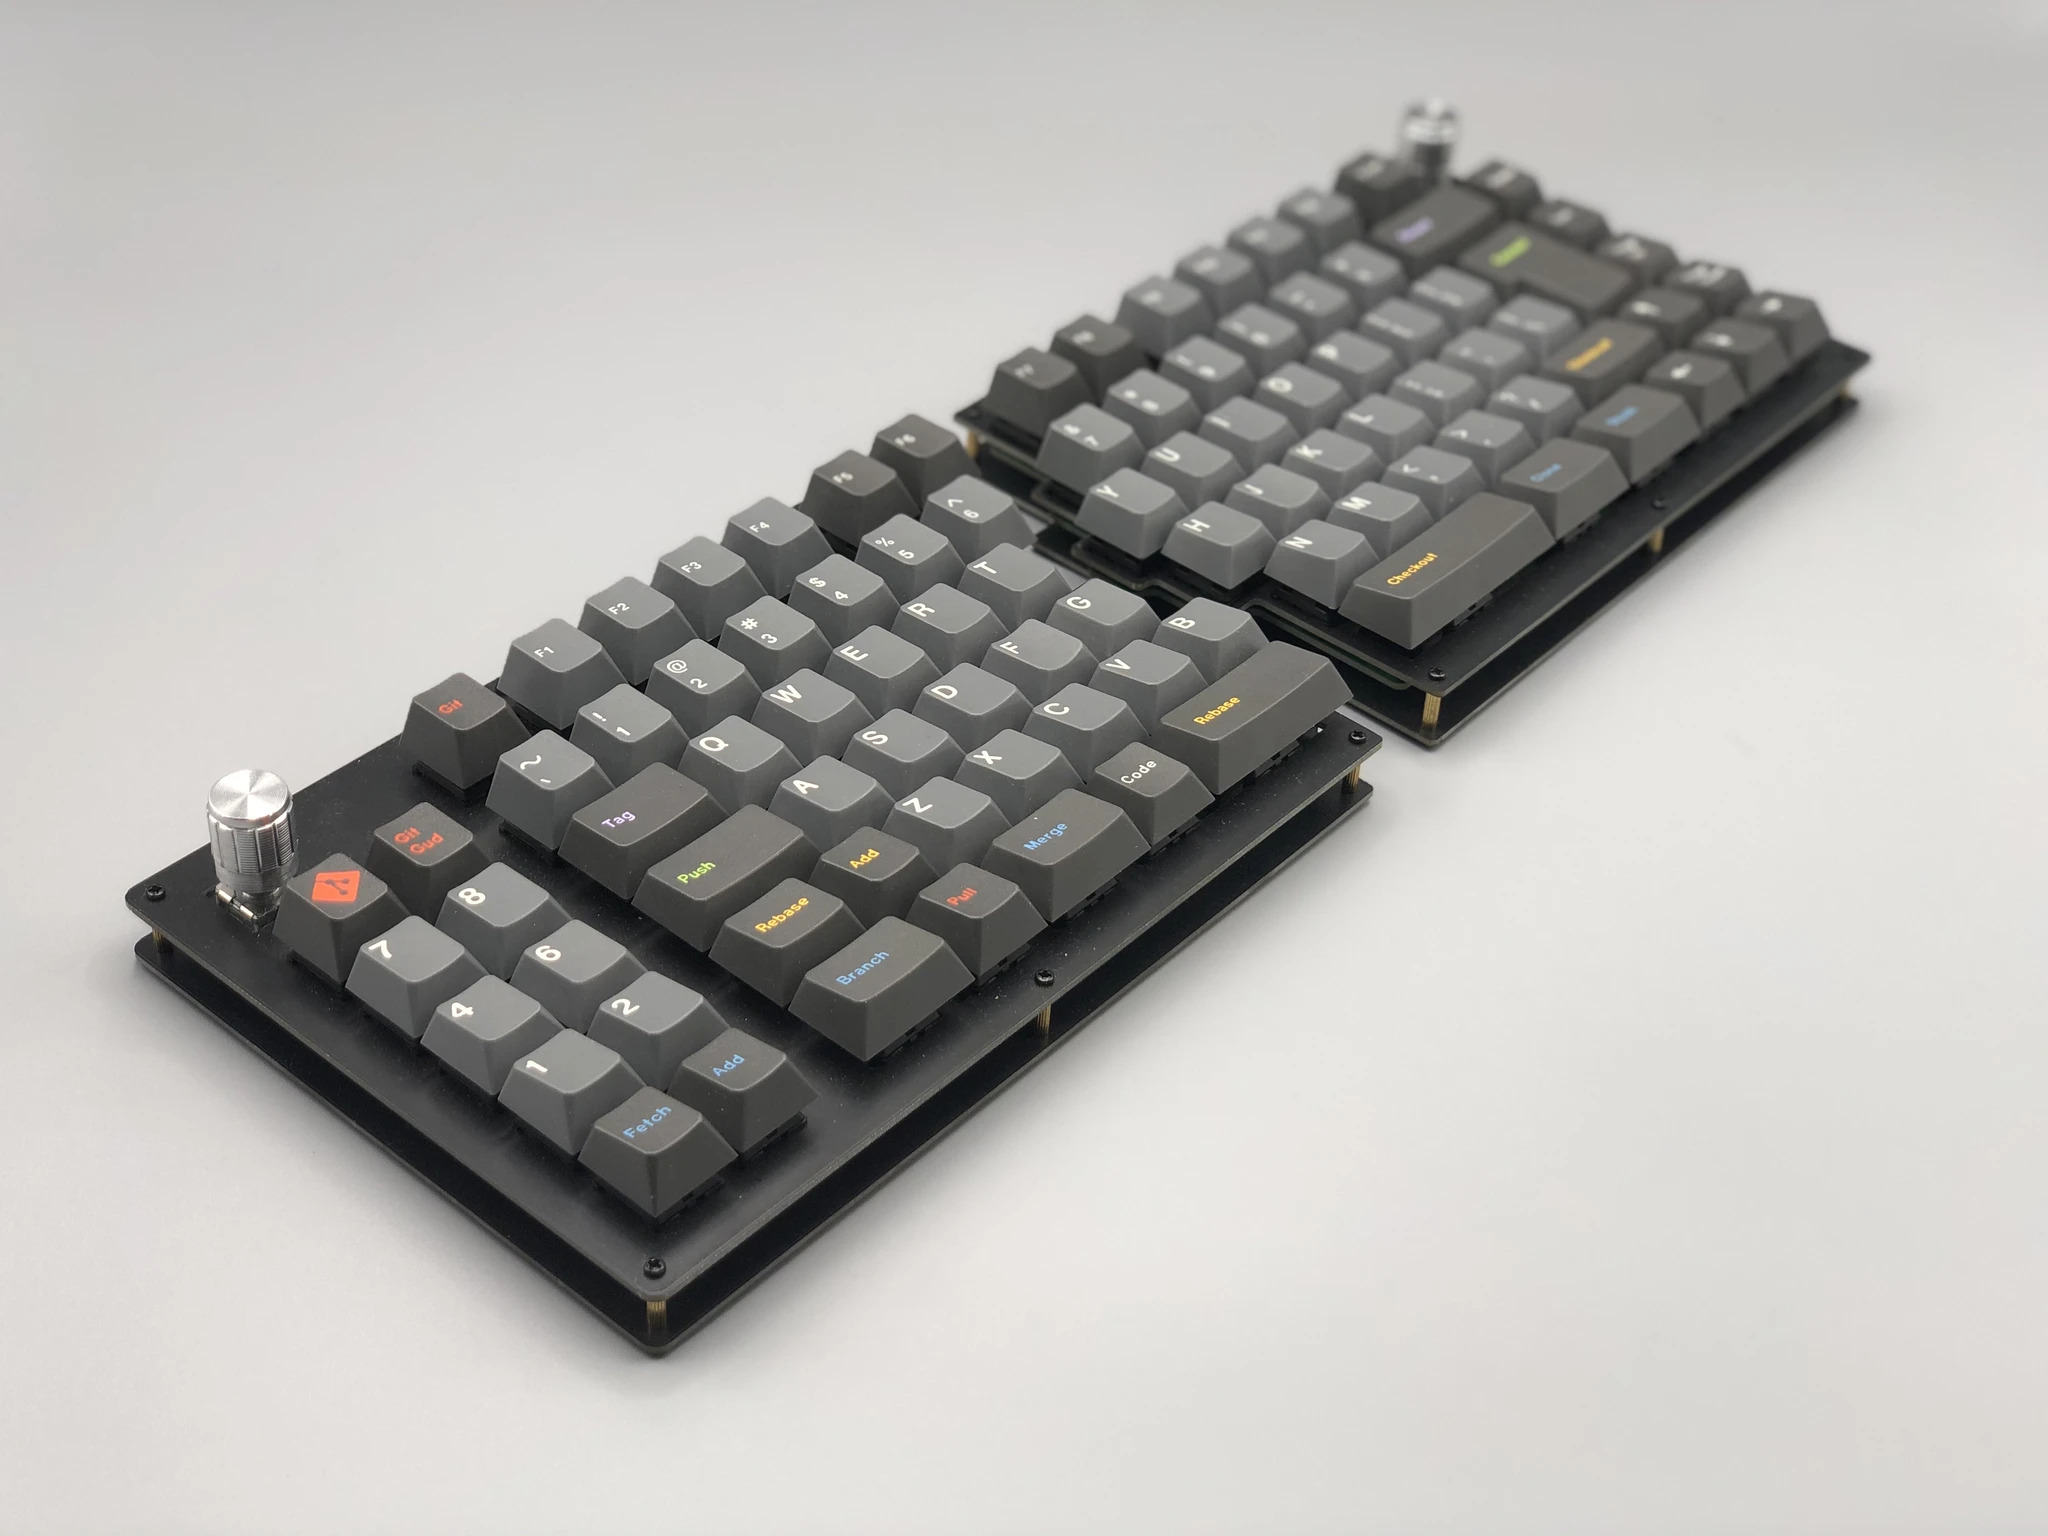
It was around this time that I found Keebio’s online store, which sells PCB and case kits for split keyboards. Many of the split keyboard PCB sellers I’d seen online focused on minimalist layouts (<=60% layouts), which I didn’t want. Keebio had 2 models that interested me: the Quefrency (pronounced “key-frency”) and the newly-released Sinc, both of which were full sized:

QuefrencySource: Keebio
SincSource: Keebio
The Sinc board had a full set of function and macro keys, so I went with that model. Keebio’s boards tend to go out of stock quickly, so I was lucky to get one from the first production run of PCBs…
PCB
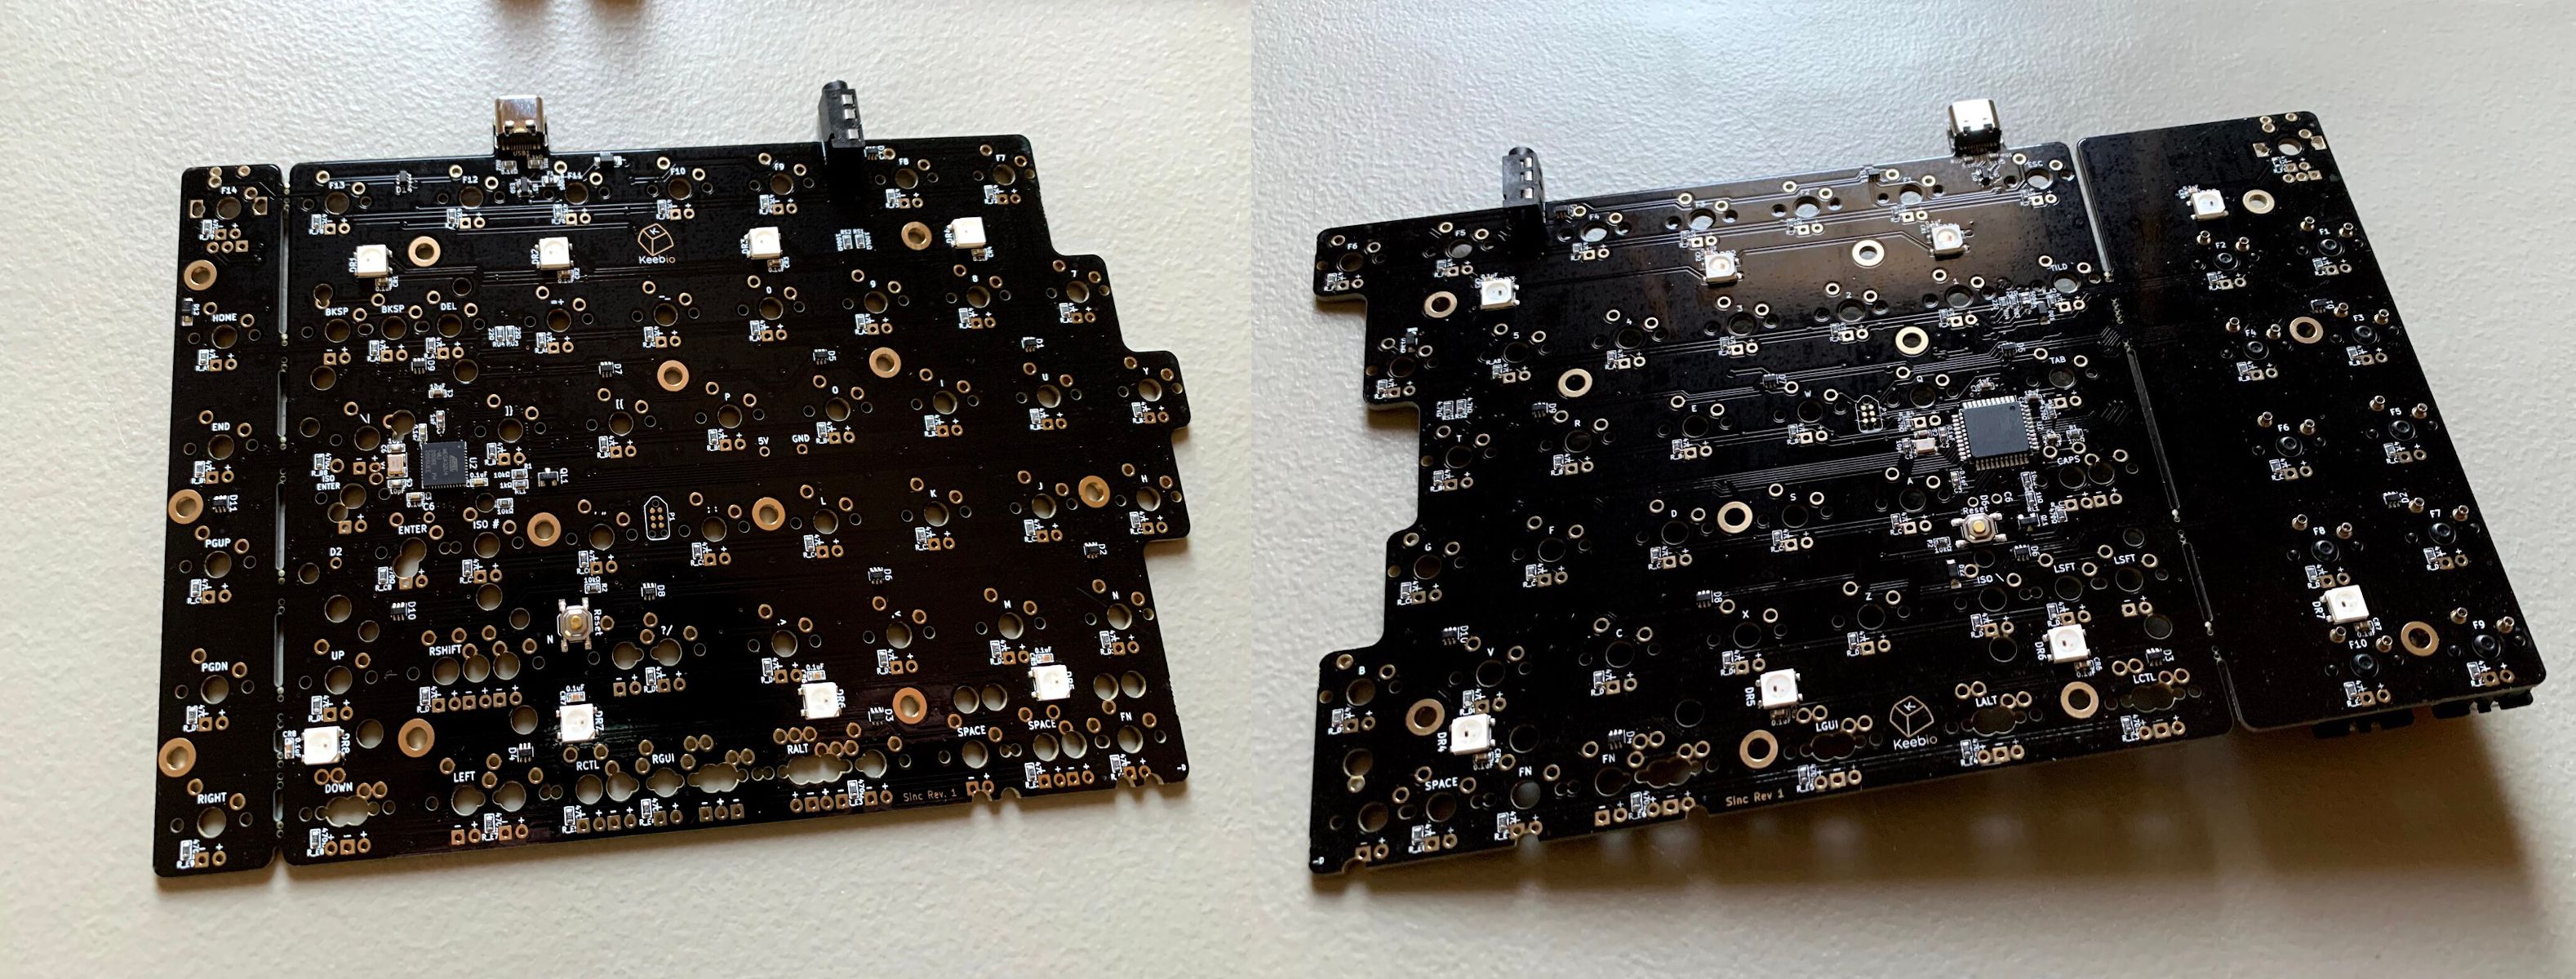
The Sinc PCB I ordered came with a microcontroller and surface-mount diodes already soldered to the board, which made assembly quite easy. From what I saw online, it’s fairly common to get a “naked” PCB, and you have to bring your own microcontroller (usually something like an Arduino or ESP32) and solder on a diode for each key switch.
I was pretty impressed with Keebio’s PCBs – the Sinc even came with underglow LEDs and a reset button on each half of the board.
Deciding on a Layout
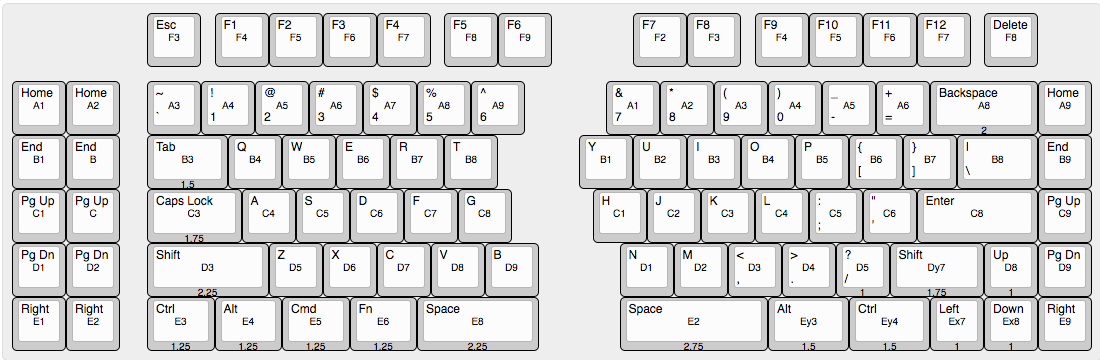
The Sinc PCB design supports a number of layout variants. I used the excellent open source keyboard-layout-editor.com to plan my layout. Though, there weren’t a ton of decisions to make; the biggest areas for customization were the arrangement of meta keys on the right side of the board and the layout of the keys surrounding each space bar.
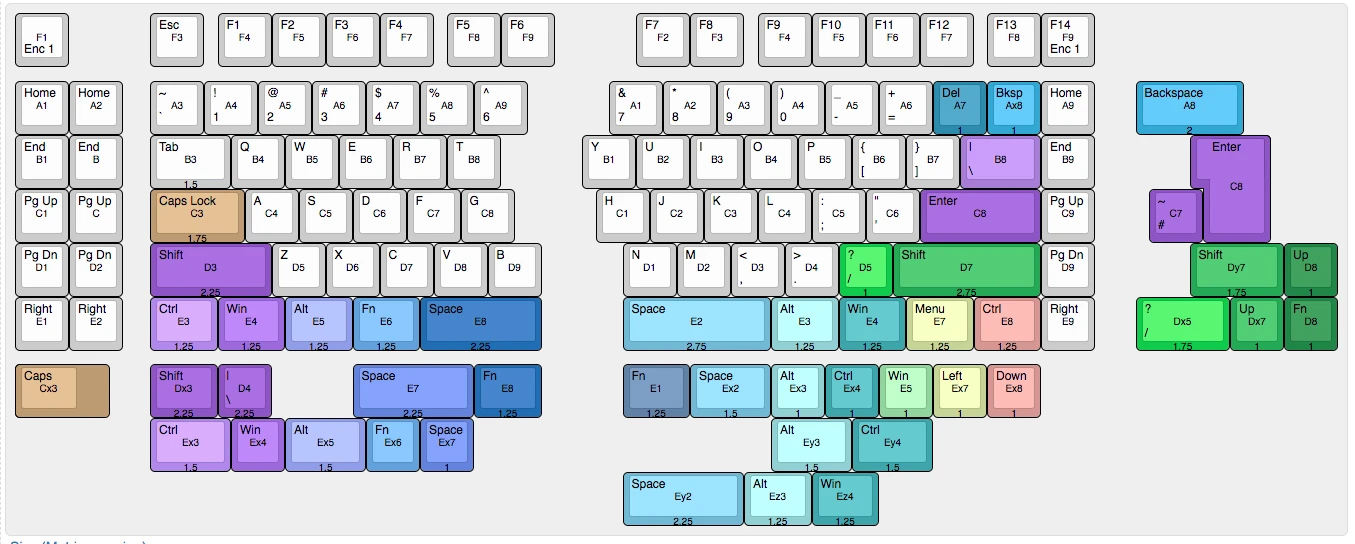
Layouts supported by the Sinc
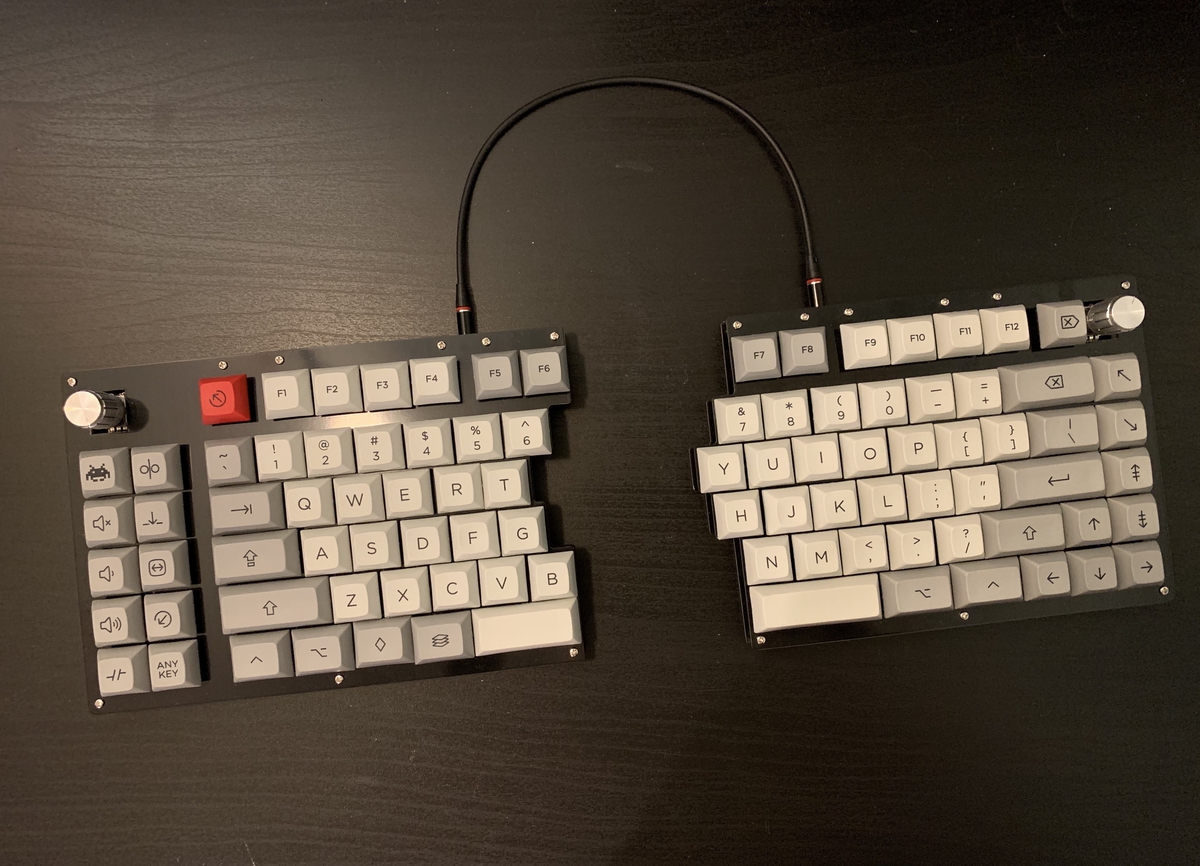
I opted for a layout that included a set of arrow keys and a larger right space bar:
Keycaps
One of my motivating reasons for building a custom keyboard was to make something that “looked cool”, so I spent a fair amount of time researching keycap designs and styles. Since my keyboard had a split layout, many traditional keycap sets wouldn’t be compatible. Notably, I needed a set that had support for the shorter split space bars, and the shorter right shift key.
After a bunch of comparisons, I settled on PimpMyKeyboard’s DSA “Granite” set. The DSA keycap profile is uniform and flat, and aside from ergonomics I think that they just look nice.
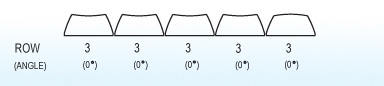
DSA ProfileSource
Of course, one’s choice of key cap is almost entirely based on aesthetics, so this was one of the more fun parts of the process. In particular, I liked the choice of font and the size of the key labels; I think it lends the board a good mixture between “retro” and modern design.
I opted for symbolic modifier keys (i.e. the shift symbol (⇧) instead of the written out “Shift” word). I’m pretty happy with how they look, and I like that I was able to repurpose some of the more obscure modifiers (i.e. scroll lock, insert, etc.) as macro keys, because their meaning is ambiguous enough to be repurposed.
The tricky part of choosing keycaps was making sure that I got full coverage of all the keys I needed. The layout I chose had non-standard space bars and some other funky keys (non-standard right shift and modifiers). Fortunately, PMK made it easy to customize my keycap set. Ultimately, I ended up needing:
- A full alphanumeric set.
- A set of symbolic modifier keys.
- Additional keys:
- 1.75u Right Shift, 1.5u Ctrl, 1.5u Alt, 5 additional 1u keys to fill out the macro pad.
Assembly
Hotswapable Key Switches
One goal that I had when building my Sinc was to support hotswappable key switches. One of the benefits of mechanical keyboards over traditional “rubber dome” keyboards is that you can customize the feel of the key switches. Some people prefer tactile or clicky switches, and others (like myself) prefer a smoother keypress. Currently, I’ve really been enjoying using linear (Cherry Red) switches, but I could imagine wanting to try out different switches in the future.
Making a keyboard “hot swapable” was easier than I anticipated: You solder a small socket into each through-hole in the PCB, and then the key switches are effectively just pressure-fitted into those sockets.
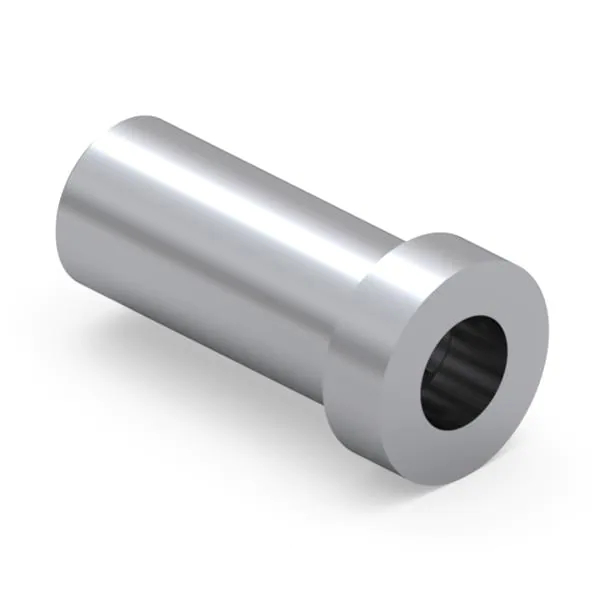
PCB Socket
I found a source of PCB sockets online, and ordered enough to have two for each key. These sockets were surprisingly expensive, given they’re just tiny pieces of metal. But, they’re a lot cheaper than a whole new keyboard – which is otherwise what you’d be looking at if you wanted to try out a new switch type.

Socket (unsoldered)
Normally, you’d solder the key switches directly to the PCB, skipping the socket step. Surprisingly, soldering the sockets instead of the switches themselves actually made assembly easier. I messed up on the placement of a couple of the keys2, and instead of having to desolder the switch, I could just solder in additional sockets (consequently, it helps to buy some extras!).
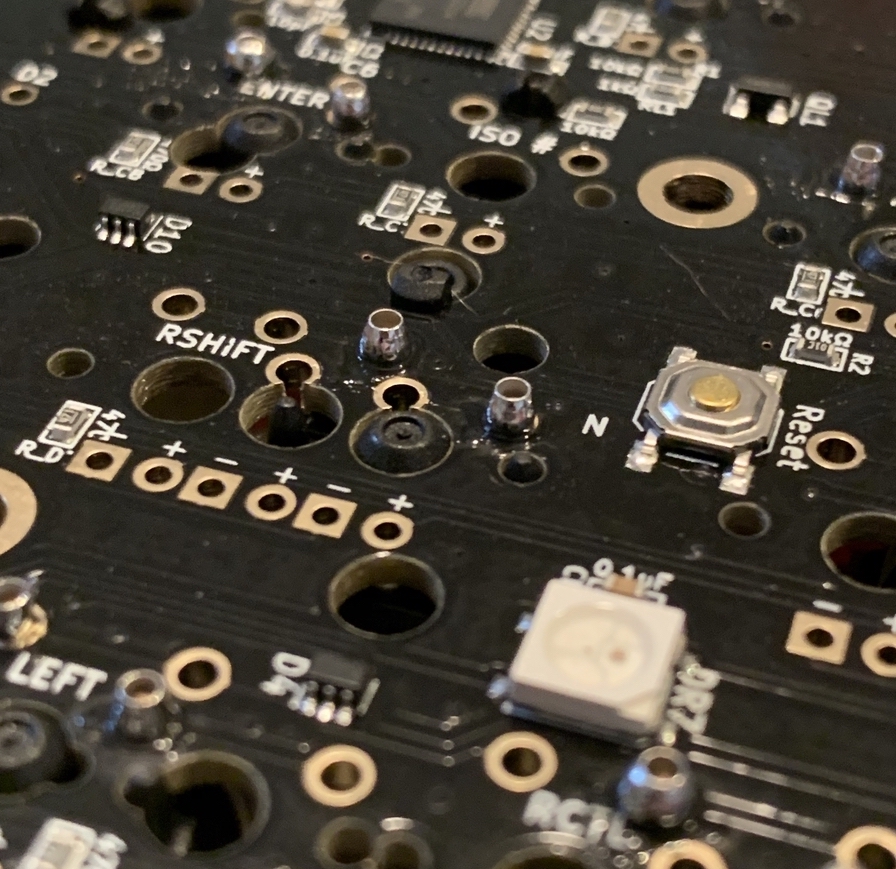
Socket (soldered)
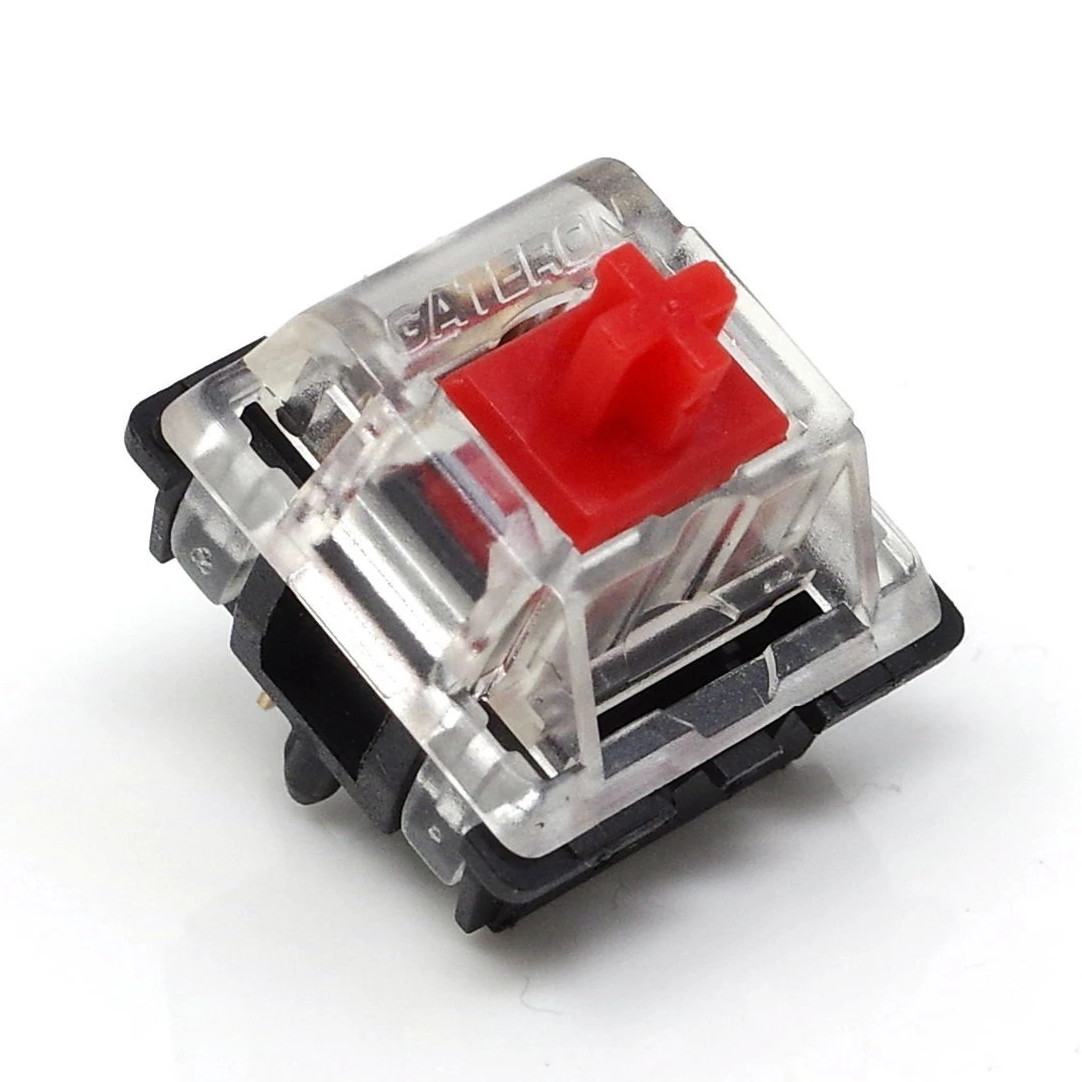
Key Switches
As for the actual key switches I used, I bought a set of Gateron Red switches from KEBO. I use Cherry Red switches on my Kinesis, and like the linear switch type. However, I’d heard good things about Gateron’s version of the Red switch (and they’re slightly cheaper).
Now that I’ve typed on the Gateron Reds for a bit, I can’t say that I notice a huge difference between them and the Cherry Reds. They do feel a bit “looser” and that they require a bit less force to actuate, but I can’t really say that they feel any “smoother”, contrary to claims I’d seen online.
Case
When I ordered the Sinc PCB from Keebio, I also ordered a set of plates to use as a case. The design of the plate is really straight forward: two pieces of metal with cutouts for the keys that are fastened together by several screws and standoffs around the perimeter. However, I was initially a bit disappointed about how it all fit together. The PCBs’ USB-C and TRRS sockets give the board a bit of height, so they didn’t sit flat on the bottom plate. It took a fair amount of tinkering to get the case to close correctly, and even then I felt like I’d done something wrong.
Making matters worse, the build documentation was fairly lacking (the portion about assembling the plate kit was copy/pasted from an older design), but since the Sinc is a new product for Keebio, I’ll give them the benefit of the doubt.
After enough messing with the tightness of each screw, I did get a final result that felt sturdy enough. I also put some rubber feed on the bottom of the plates to prevent the keyboard from slipping on my desk.
Finished Product
I really like the way that the keyboard came out! Aesthetically, I think it looks pretty cool, and ergonomically it’s nearly as comfortable as my Kinesis.

I showed my completed keyboard to some coworkers, and one of the first questions I got was “what does the Space Invader key do?”. My answer was… “nothing yet”. I still haven’t decided how to map each of the macro keys, but the Sinc supports the open-source VIA Firmware (as well as QMK), which makes it really easy to setup macros. My current favorite macro key is one that automatically locks my machine. Dedicated media keys are also handy…
Building a custom mechanical keyboard was certainly more expensive (not to mention time-consuming) than purchasing a pre-made one, but that’s understandable given the economics of short-run manufacturing.
Overall, this was a fun project. It’s rewarding to have built something that I’ll continue to use daily, and I enjoy seeing the finished keyboard on my desk – it’s almost like a functional piece of art.
-
I used to use an old full-size Apple keyboard. I don’t recall what the “official” name was, but it was the old style scissor switches, predating the “magic keyboard” era. ↩︎
-
Since the Sinc supports multiple layouts, some of the key switch locations are ambiguous. I guessed wrong a couple times, and only discovered my mistake once I’d put the whole thing together and was in the processes of attaching the key caps. Fortunately, since I was using the sockets, I didn’t have to desolder any switches. ↩︎